
Creating a survey campaign
Using a Campaign to invite respondents to take the survey
The campaigns center allows you to distribute your survey to your respondents using either email or mobile phone SMS messages and to manage all your campaigns and see how well they are performing. By creating a campaign, you can invite respondents to take your survey
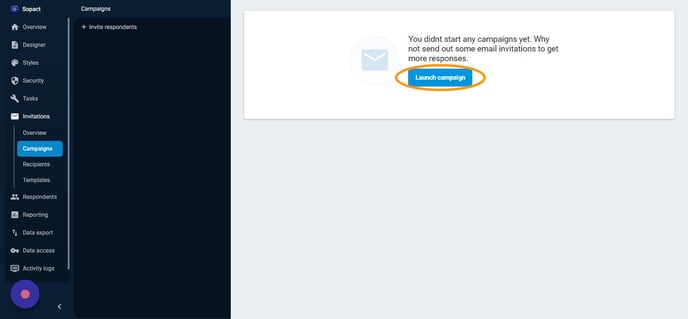
1. Click on Invitations and then navigate to Campaigns to "Launch campaign".
2. Click on "Launch campaign".
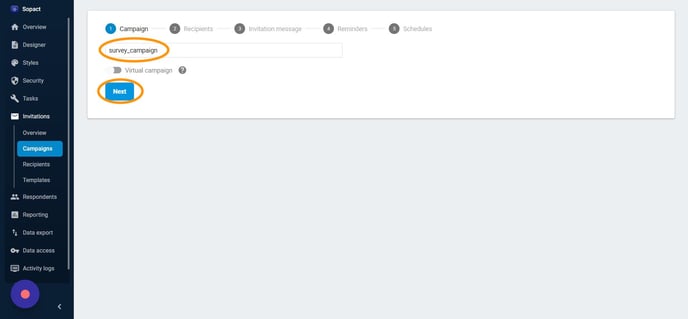
3. Click the "Campaign name" field and Give a name to the Campaign. Example: "survey_campaign". Click Next
Campaigns can be sent using Emails, SMS, and WhatsApp.
Emails can be sent using one of the following ways
1. Email list, 2. Import Emails, and 3. Panels.
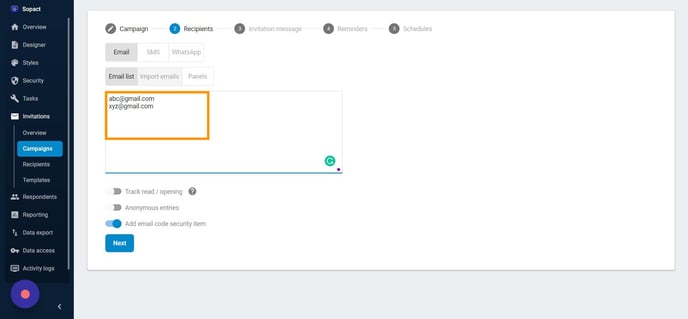
4. 1st way is: Click on "Email". Go to the "Email list" and add a list of emails.
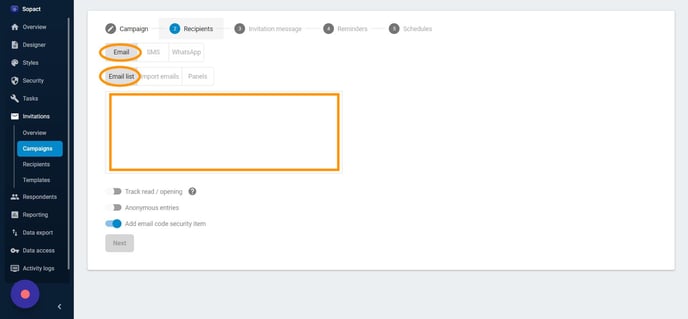
5. Add emails of the relevant respondents .....
OR
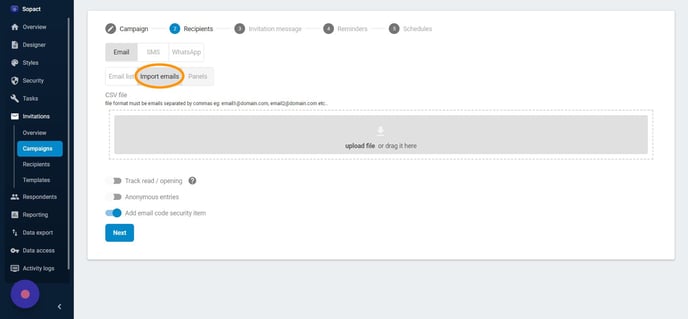
2nd way is to use "Import emails" to send emails.
6. Click on "Import emails". To import emails, upload Excel files.
OR
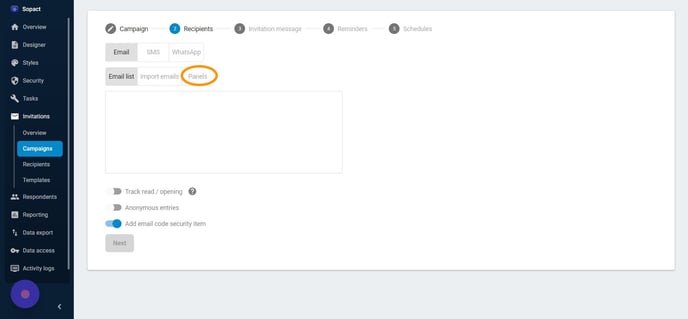
3rd way is to use "Panels" to send Emails
7. Click on "Panels".
8. Click any of the desired Panels.
Example: "Sopact Test"
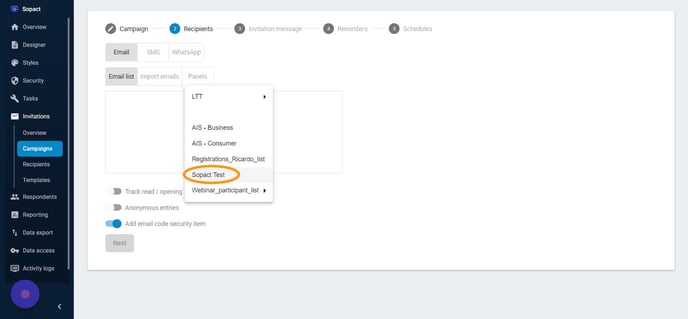
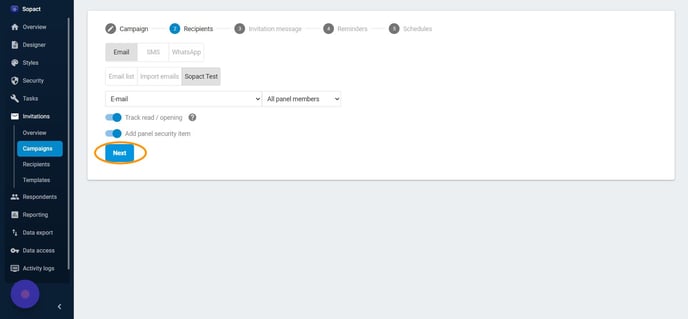
9. Click this dropdown -> Select email recipient as the attribute.
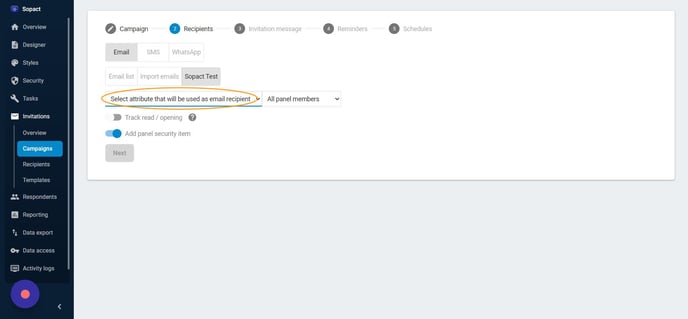
10. Click on "Next"
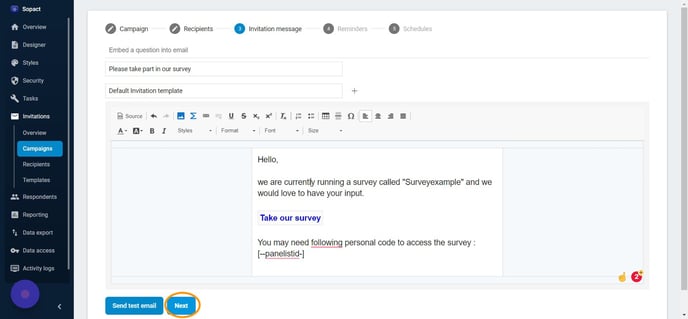
This is will navigate you to the Invitation message. The Invitation message is as shown. This can be customized as per required.
11. Click on the message "Hello, we are currently running a survey called "Survey example" and we would love to have your input.
Take our survey
You may need the following..."
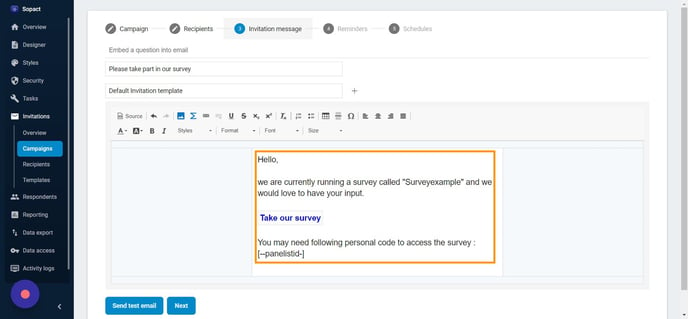
12. After finalizing the Invitation message. Click on "Next"
Tip!
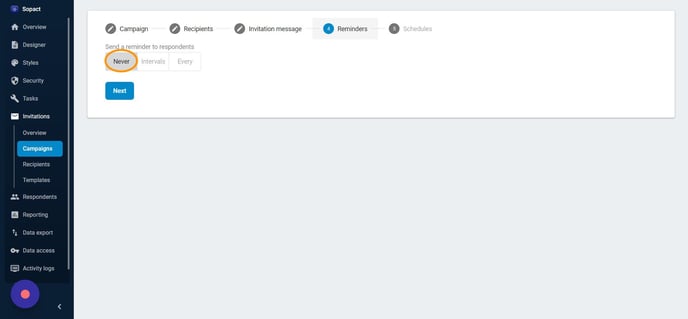
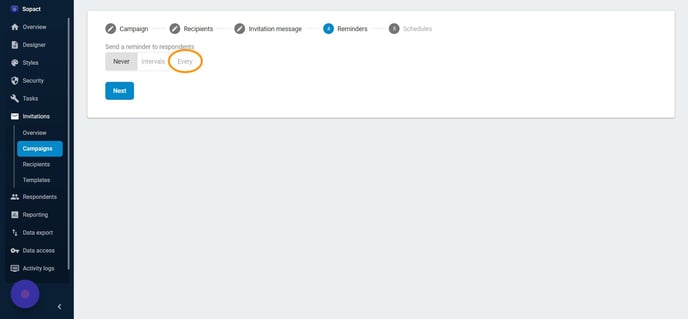
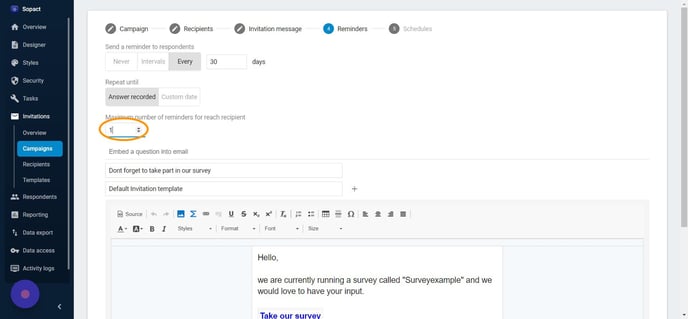
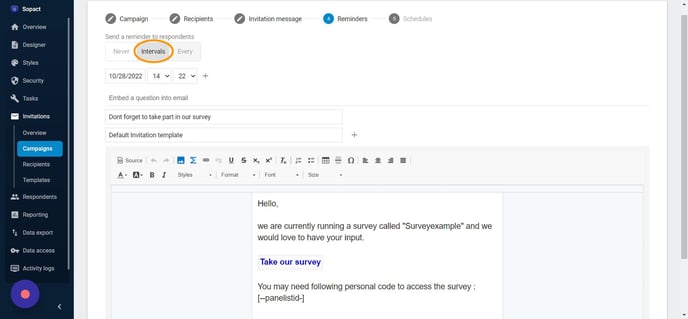
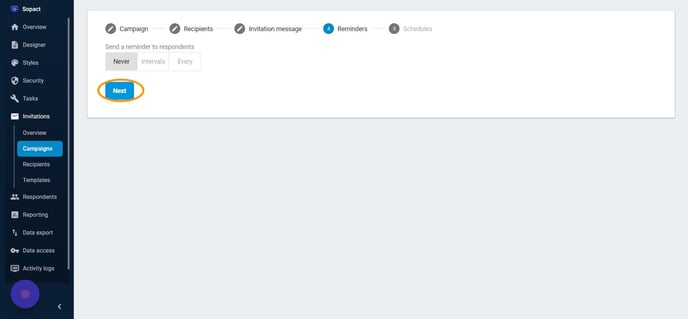
REMINDERS: Send a reminder to respondents:
1. Never - Denotes to never sending reminders.
2. Intervals - Denotes sending reminders on multiple dates and times.
3. Every - Denotes sending reminders after a specific number of days.
Repeat this reminder till the Answer is recorded.
13. This will navigate you to Reminders. Click "Never"
OR
14. Click "Every"
15. Click this number field.
OR
16. Click "Intervals", To add multiple Intervals.
Select One of the desired options to set reminders: Never or Intervals or Every.
17. After one of the desired selections, navigate the final step to set the survey
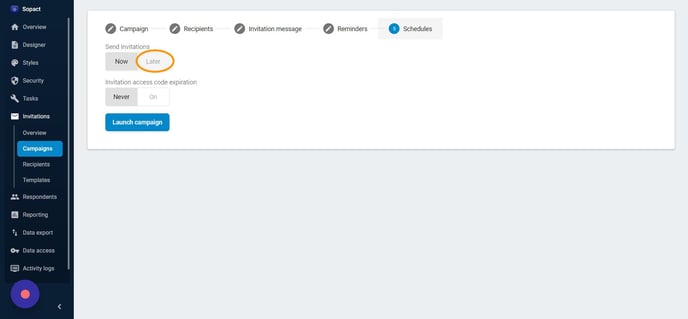
Tip! - Surveys can be sent on Now or can be scheduled for a later date.
18. Click on "Now" to send the invitations immediately once the campaign is launched or Click "Later" to schedule it.
19. Click "Later"
20. Click this dropdown to schedule the campaign.
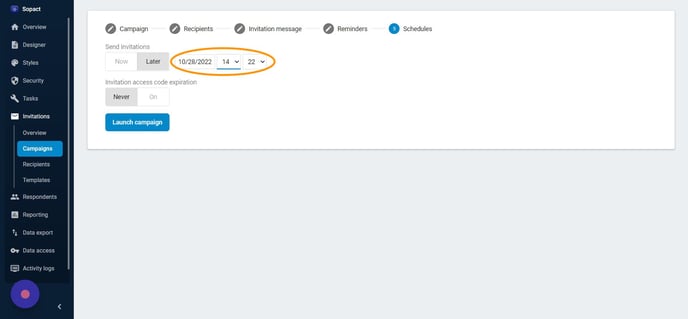
21. Once the desired selection is made, Click on "Launch campaign". This step will invite the respondents to take the survey.
Tip!
Invitation access code expiration:
Additional security can be added by creating an access code to access the campaign.