
Import data from Sopact Survey
Connecting the survey to a Project.
Once you collect the data using the survey, you can connect it to a project and create a dashboard around it.
Step 1: Log in to the Impact Cloud instance assigned to your organization. For this example, we are using “demo.sopact.com”
Step 2: Once you are logged in, navigate to “Projects” on the menu bar and click on “Create Project” on the top right side of the screen:

Step 3: Type the name of your project and optionally, add a description. Then click on Save.

Step 4: The project will start displaying on the list like so:

Step 5: Click on the project’s name and then click on “New Connection” on the top right corner of the screen:

Step 6: The below window will appear:

Step 7: Click on “Select Source” to select “Sopact Survey”:
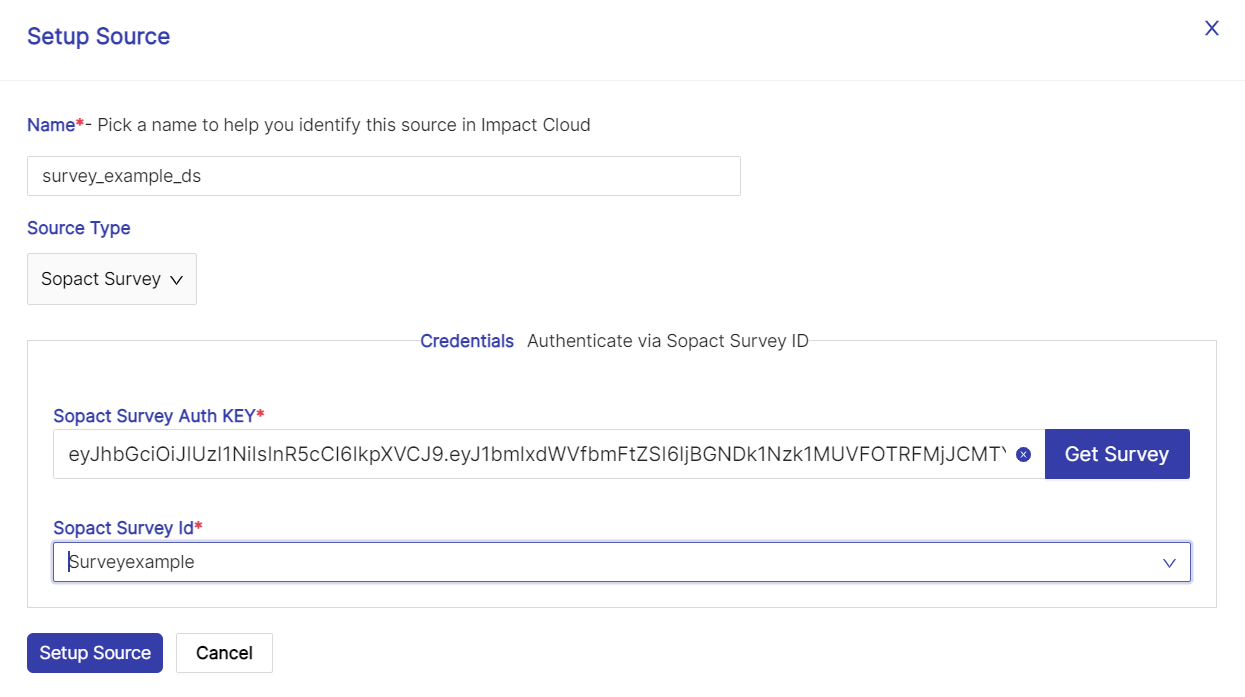
Then, fill out the information considering the following guidelines:
Name | Type a name for the datasource
Source Type | Pick Sopact Survey from the dropdown list
Sopact Survey Auth KEY*
| Copy & paste the authorization key. Below are the instructions on how to find it.
Get Survey | Click on this button.
Sopact Survey Id* | After clicking on “Get Survey” a list of surveys will show up in the dropdown “Sopact Survey id.” Select the appropriate one.
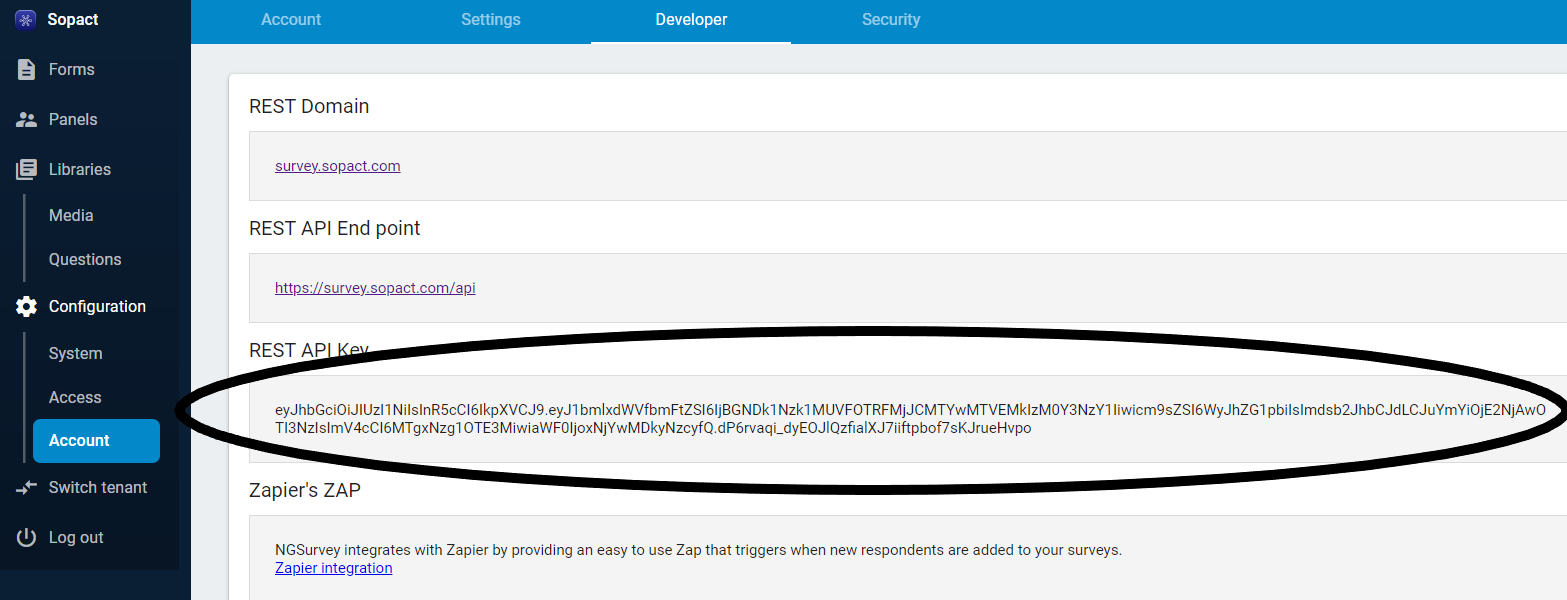
*The Auth Key can be obtained from the survey app (survey.sopact.com). Go to “Configuration,” then click on “Account.” Click on “Developer Tab” and copy the full text under the “REST API key” box; this is your authorization key.
Step 8: Once all the details are filled in, click “Set up Source.”
Step 9: The following screen will reappear:
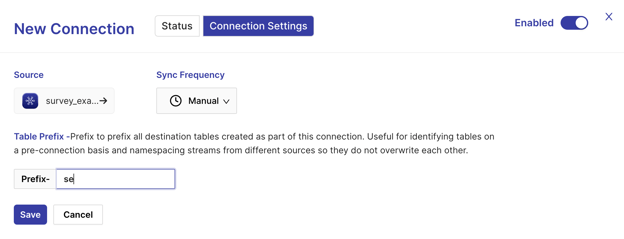
Set the “Sync Frequency” to “Manual” and optionally type a Prefix. The prefix will appear at the beginning of your survey’s name to help you easily identify it. This might only be helpful if you have multiple surveys.
Step 10: Click on Save. The following screen will appear:
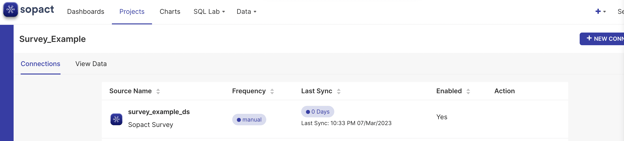
You have successfully created the connection to Sopact Survey.
Syncing survey data to a dashboard.
You will need to sync the survey data the first time you connect a survey and any time you have new records collected.
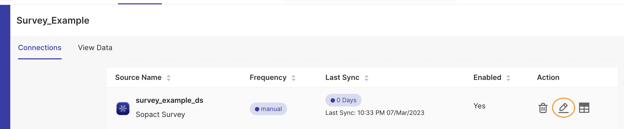
Step 1: Go to “Projects” and find the survey you want to pull. Hover over the right side of the connection. Three icons will appear. Click on “Edit” (pencil icon).
Step 2: This will open up the following screen. Click on “Status”
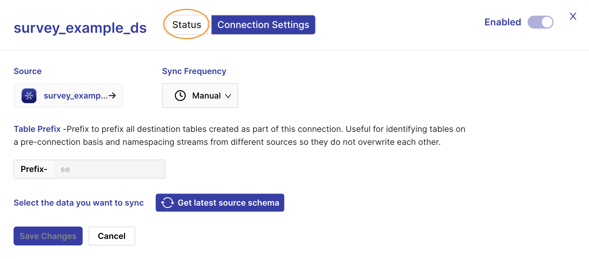
Step 3: The following window will display:

Click on “Sync Now.” You will get the message “Synced successfully.”
Step 4: Navigate to “Datasets” and confirm that a dataset with the name of your survey has been created:

Now you can use that dataset to start creating charts and dashboards.