
In this article we will look at what a virtual data set is, why use them and how to create them.
Introduction
Virtual datasets are similar to physical data sets and can be used for data analysis and to create visualizations but are fundamentally queries that make use of the physical datasets. These are not stored in the database.
Problem:
If you have data on google sheets that you decide to integrate with our visualization platform, you'll notice that all the fields/columns in the google sheet dataset comes in as text field. This is not ideal but necessary as google sheet is a free form table where the columns don't necessarily have a strict type and users can input any kind of data. But from database standpoint this doesn't work as it needs the columns to have an appropriate type to perform aggregation. For example, lets say there is a salary field, if this is interpreted as text then it cannot be aggregated into anything meaningful (like average salary or total sum of salary)
Solution:
To avoid the problem highlighted above, we turn the physical datasets into virtual. And while doing so the system allows us to change the type from text to number or for that matter to a date type as well (if that is applicable)
Lets say your google sheet looks like this

Let us look at how to convert this to a virtual data set and also change the column(field) types appropriately
- After you bring this data into the platform using google sheet integration feature
- Navigate to the datasets and you should be able see the dataset (the screen will look like so)

- Lets click on the dataset and we will be navigated to the below screen
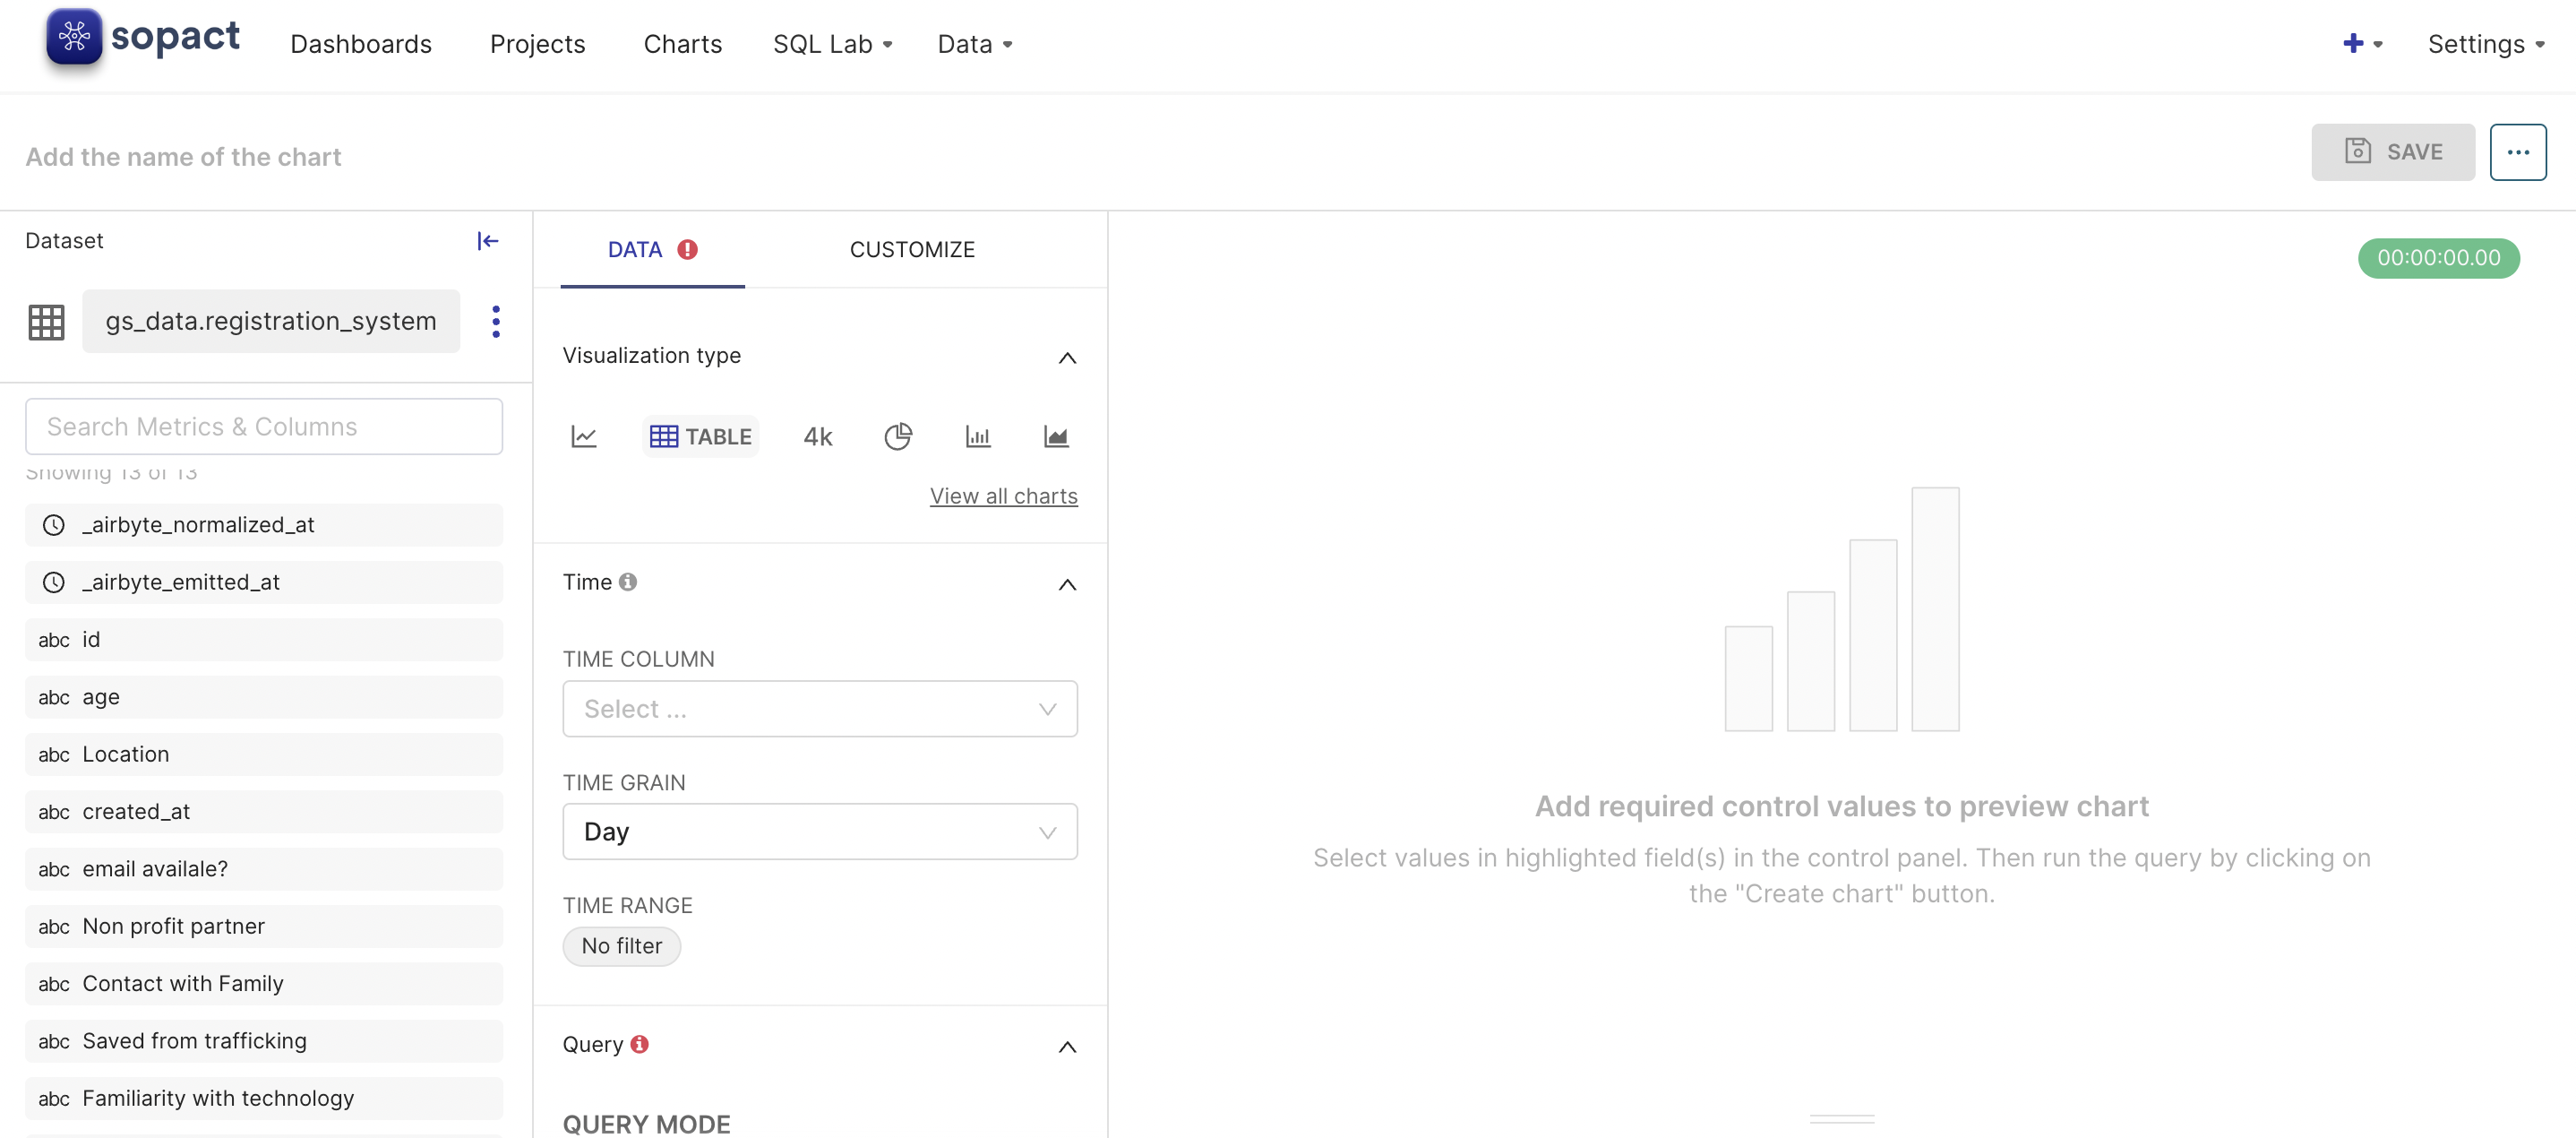
- Notice on the left bar that all the columns have been recognized as text (represented by "abc")
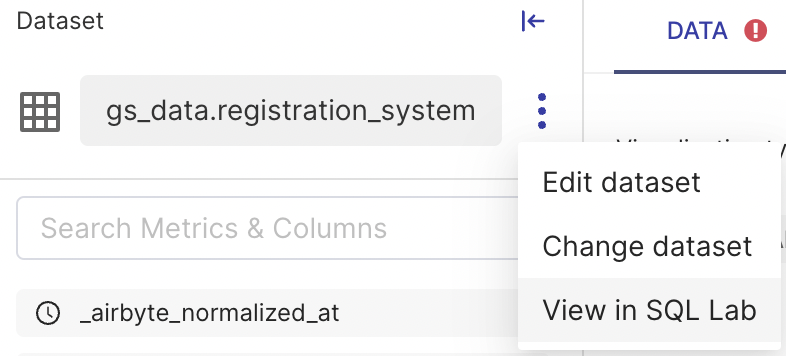
- To change this to virtual dataset and to interpret the column type appropriately, we click on the 3 dots and select the option "View in SQL Lab"
- You will see a screen that looks like below
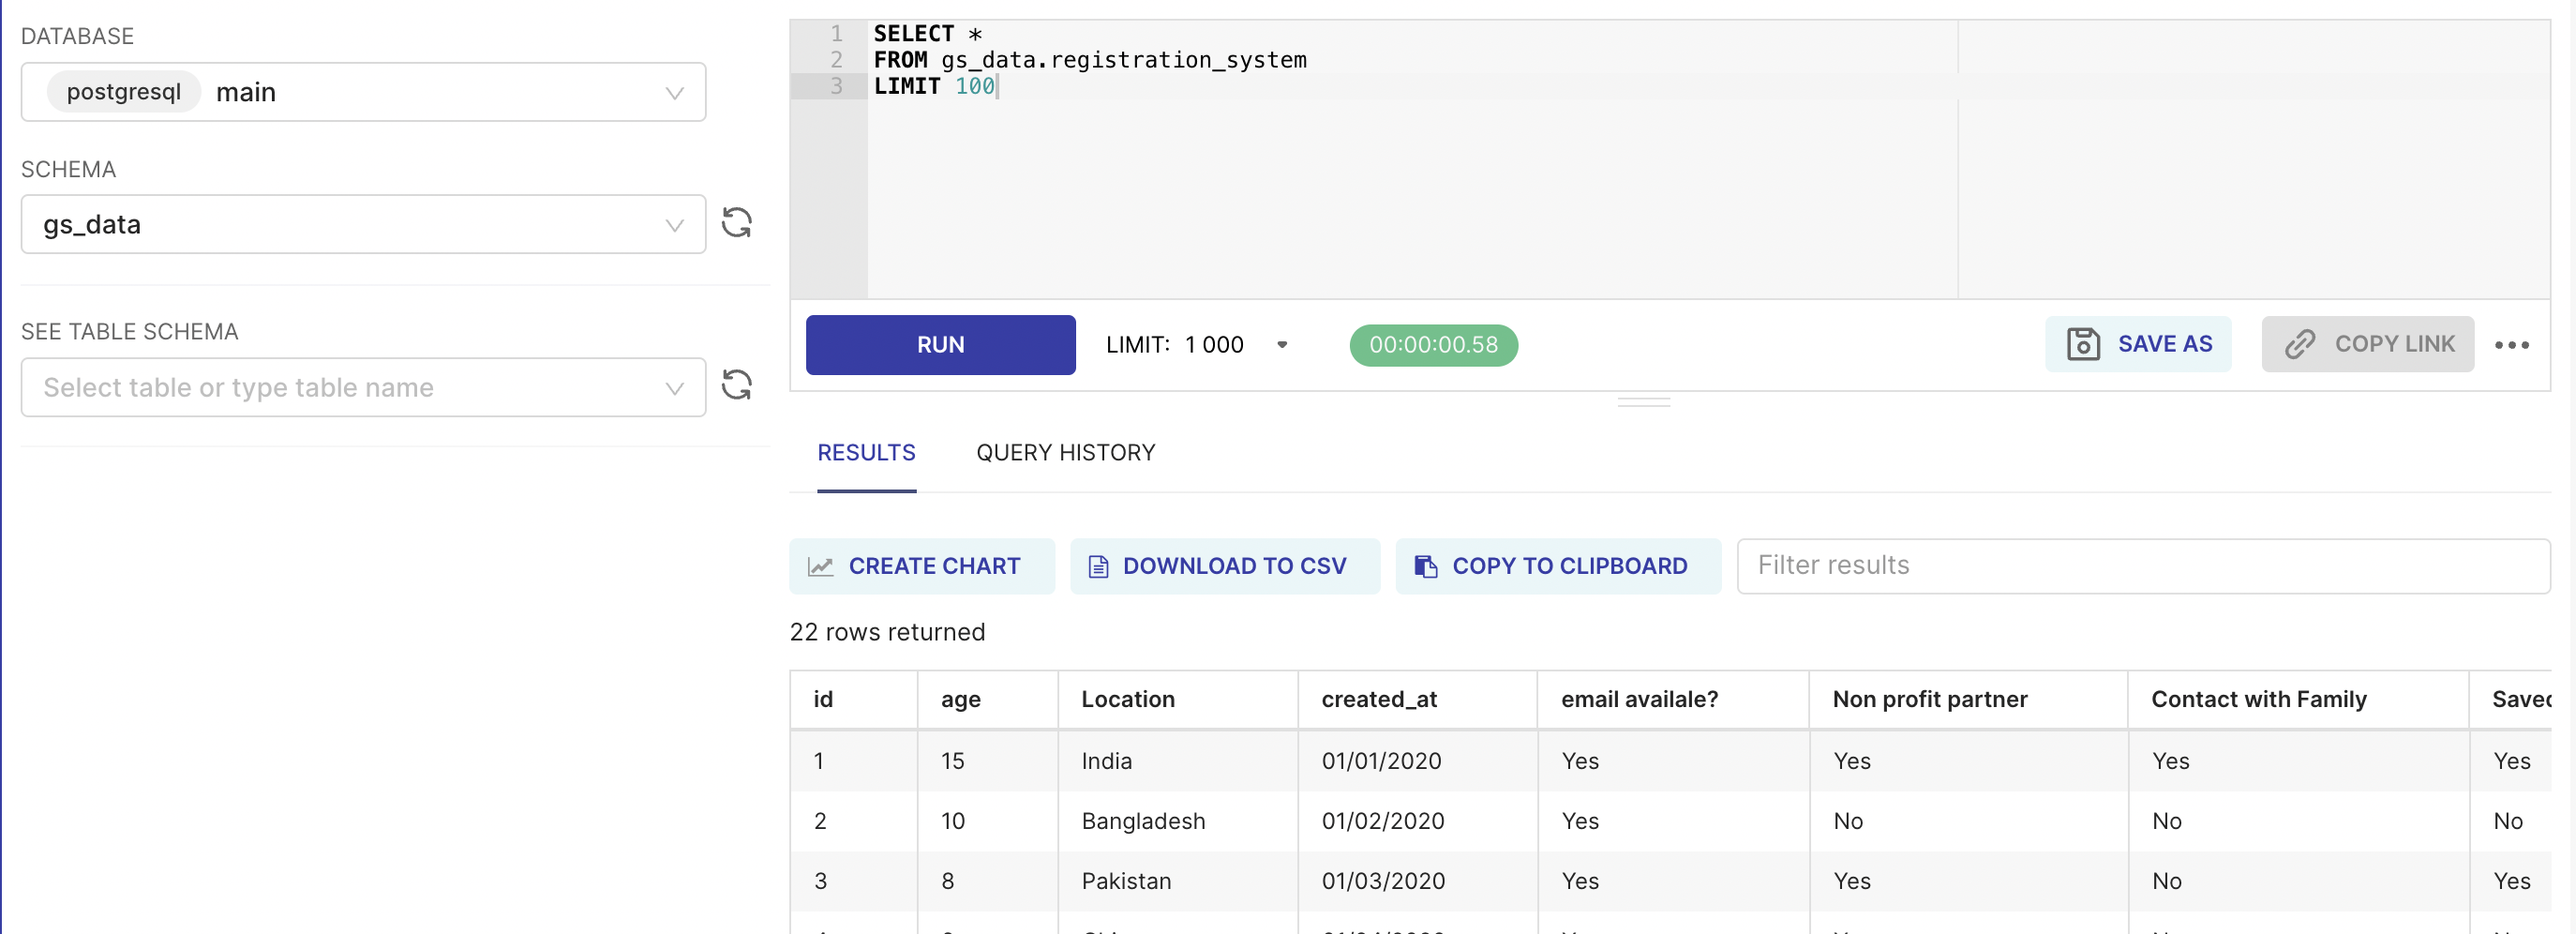
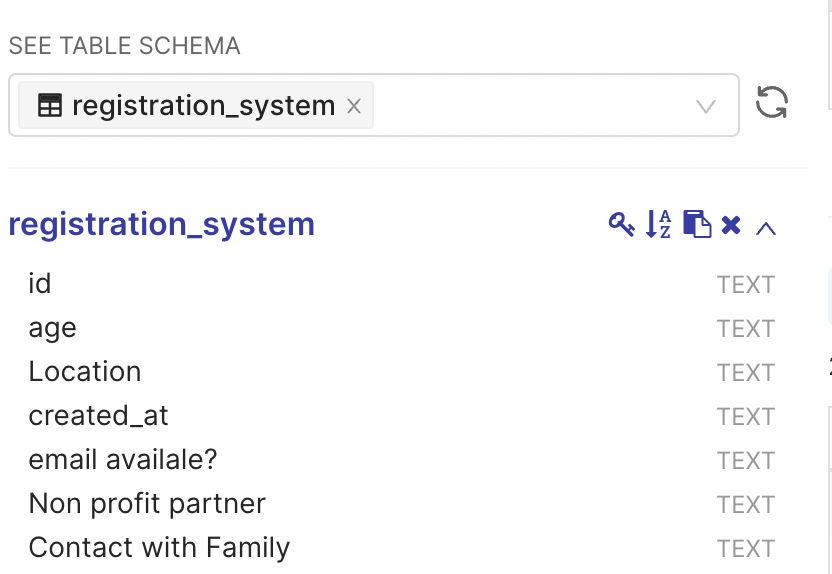
- On the left side menu choose the table in the "SEE TABLE SCHEMA" drop-down, like so
- Let us now copy the select statement to make modifications to the datatype and column name if necessary, click on this icon

- Paste the statement on the text area on the right side (delete any other text that might have been in the text area), like so
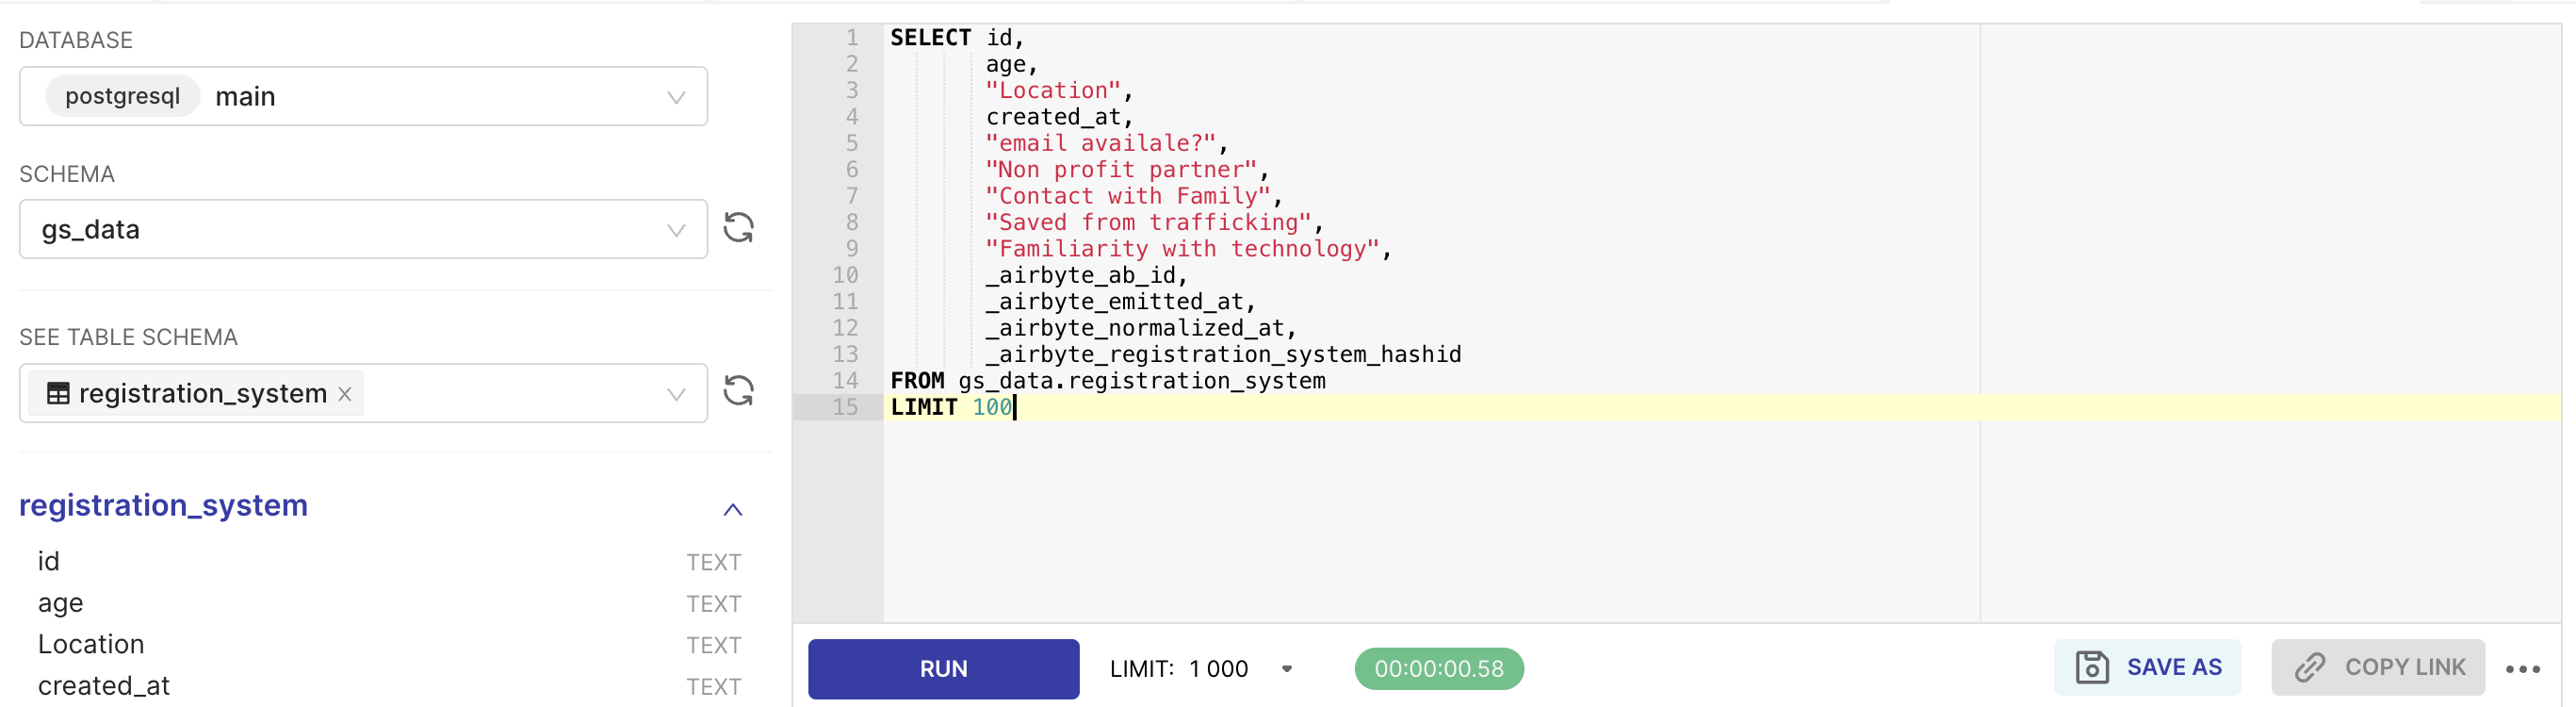
- To change the datatypes of these columns, for example starting with id that has been interpreted as TEXT but should be a number, we need to do the following (append ::FLOAT after the id and put id in between double quotes like so)
"id"::FLOAT,
At this point the select statement might look like
SELECT

       "id"::FLOAT,
       age,
       "Location",
       created_at,
       "email availale?",
       "Non profit partner",
       "Contact with Family",
       "Saved from trafficking",
       "Familiarity with technology",
       _airbyte_ab_id,
       _airbyte_emitted_at,
       _airbyte_normalized_at,
       _airbyte_registration_system_hashid
FROM gs_data.registration_system
11. Lets say you want to change the name of the column, for example from id to "user_id", to do that, we use "as" keyword followed by the new name for the column
"id"::FLOAT as "user_id",
Now your select statement looks like this
SELECT

       "id"::FLOAT as "user_id",
       age,
       "Location",
       created_at,
       "email availale?",
       "Non profit partner",
       "Contact with Family",
       "Saved from trafficking",
       "Familiarity with technology",
       _airbyte_ab_id,
       _airbyte_emitted_at,
       _airbyte_normalized_at,
       _airbyte_registration_system_hashid
FROM gs_data.registration_system
12. Lets rename columns with question marks in the column names and change the datatypes to whatever is applicable (if possible avoid blank spaces and replace them with an underscore)
SELECT

     "id"::FLOAT as "user_id",
      "age"::FLOAT as "age",
      "Location",
      "created_at"::TIMESTAMP,
      "email availale?" as "email_available",
      "Non profit partner" as "non_profit_partner",
      "Contact with Family" as "contact_with_family",
      "Saved from trafficking" as "saved_from_trafficking",,
      "Familiarity with technology" as "familiarity_with_technology",
       _airbyte_ab_id,
       _airbyte_emitted_at,
       _airbyte_normalized_at,
       _airbyte_registration_system_hashid
FROM gs_data.registration_system
13. Run the query by clicking on the button "RUN SELECTION", you should get an output that looks like the screenshot below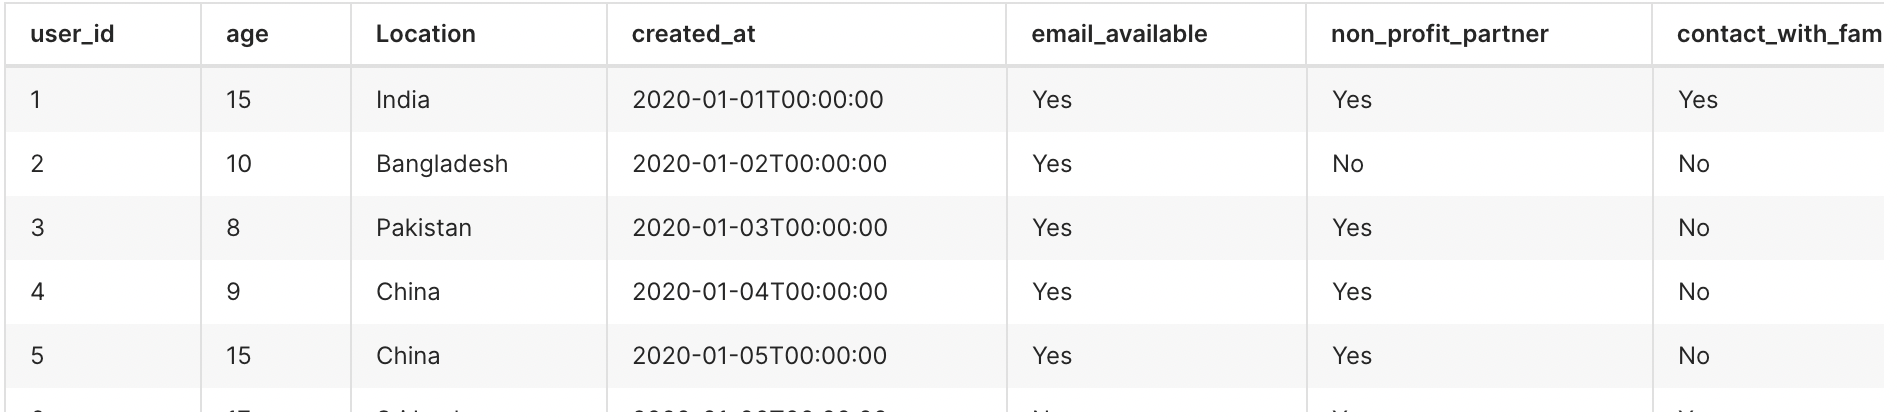
14. To save this as a virtual dataset, click on "CREATE CHART" and youn will see the following popup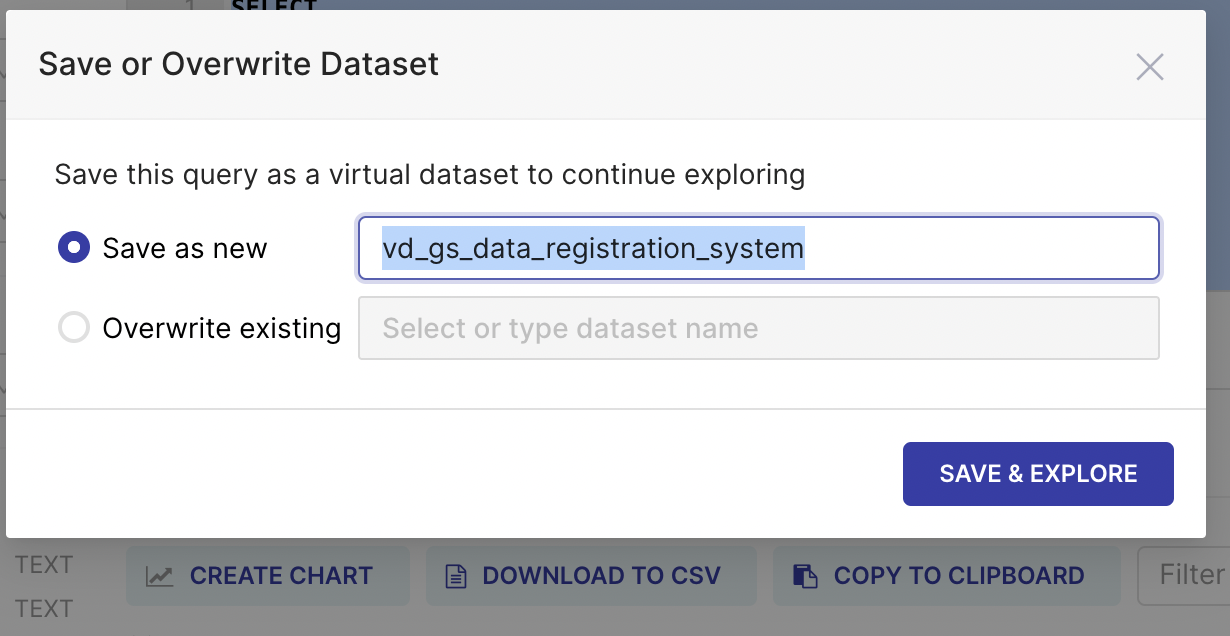
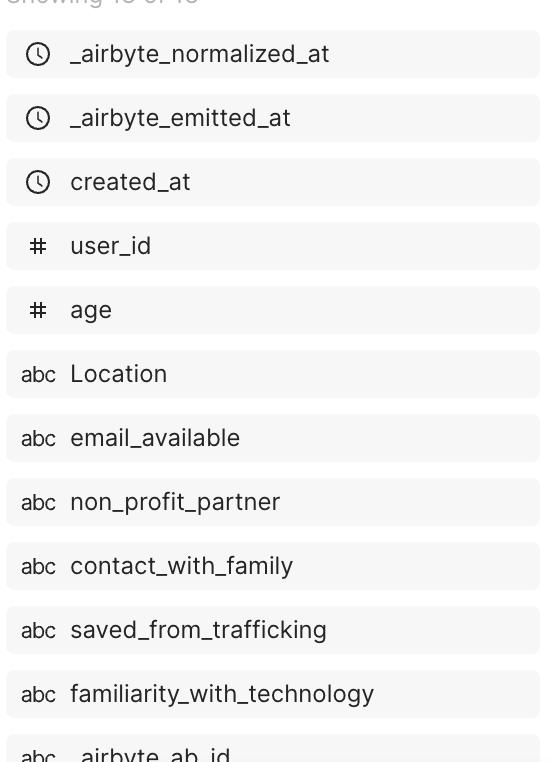
15. Click on save and explore and you will be navigate to the chart creation screen. Notice on the left side that the columns now have appropriate types and they have been renamed to the names you set in the above query
The advantage of virtual dataset is that tomorrow if you want to make more changes you will be able to do them without adversely affecting the dashboard that may have been built on the original virtual dataset.