
In this article, you will learn to resume/update the progression of survey using Security Item - Access Tokens
Problem
You have a long survey with multiple pages and want to save the progress without submitting the survey / update the submitted answers in the survey. You want to be able to return to this point at any time to resume the survey where you left off or to update the answers after submission.
Before going through this article we strongly recommend that you go through the following articles :
1. Resuming Surveys / Progress Completion of Surveys
Solution
This can be accomplished using two steps :
1. Adding a Security Item this by adding a Security Item Access Token and enabling it.Please refer to this article.
2. Using this security item Access Token while administering the survey.
Let's understand how to do this.
In this article, you will learn how to use the Access tokens to administer the survey using Campaigns and weblink.
Step 1: Add the security item and generate the tokens. Refer to the Article : Once the tokens are generated, go to Step 2.
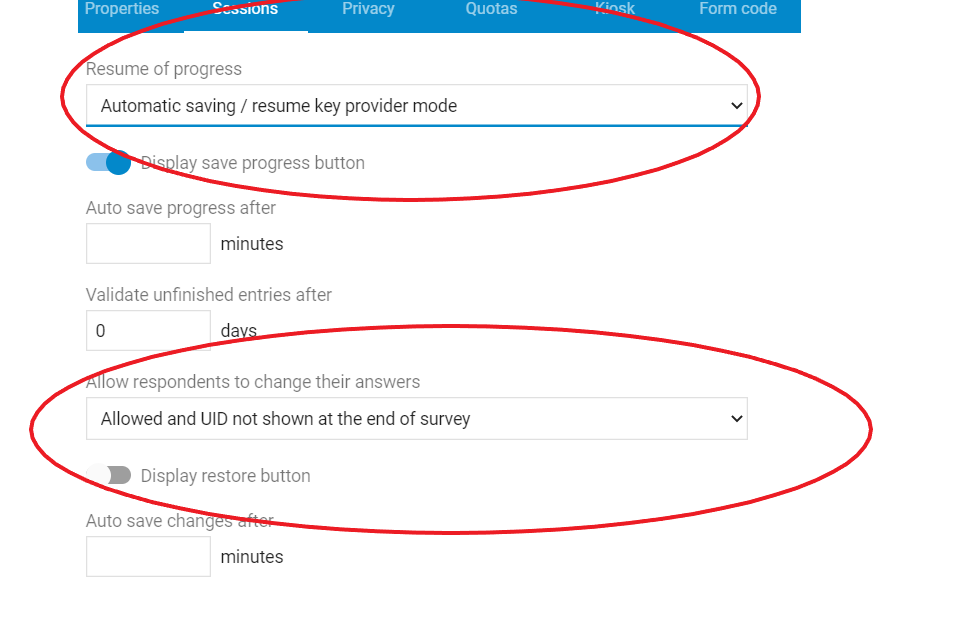
Step 2 : Go to the properties page by navigating to the Designer view.
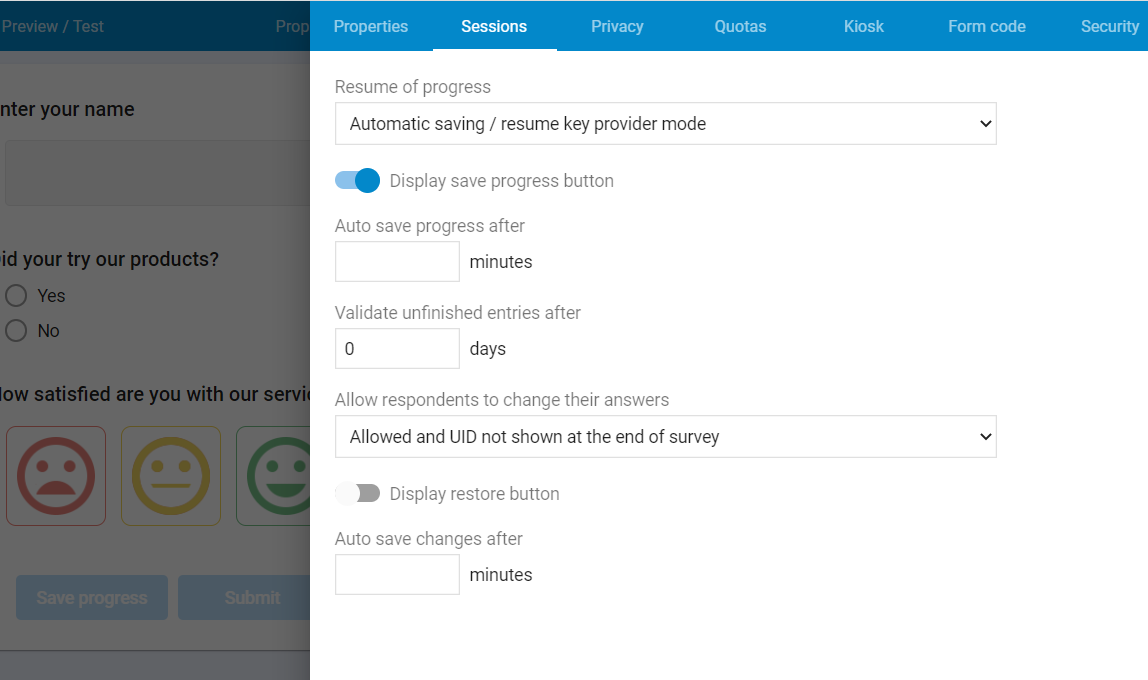
Step 3 : In the properties page, navigate to Sessions veiw and set the following.
1. Under Resume of progress
Select - Automatic saving / resume key provider mode
Enable the Display save progress button
2. Allow respondents to change their answers
Select - Allowed and UID not shown at the end of survey
Disable restore button
Step 4 : Once these properties are set. Let's send out the surveys with Access Tokens Security Item
There are two ways to send this survey.
1. Using Campaign.
2. Using web link.
1st WAY - STEPS TO SEND OUT SURVEYS WITH ACCESS TOKENS USING CAMPAIGNS.
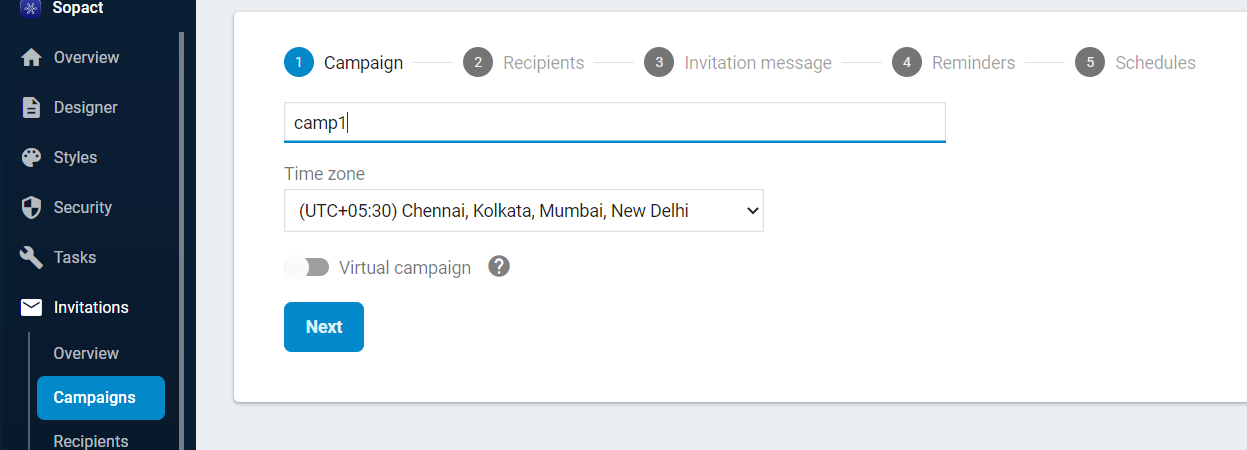
Step 1 : Create a campaign as shown below.
Step 2 : Go to Recipients using the Next button
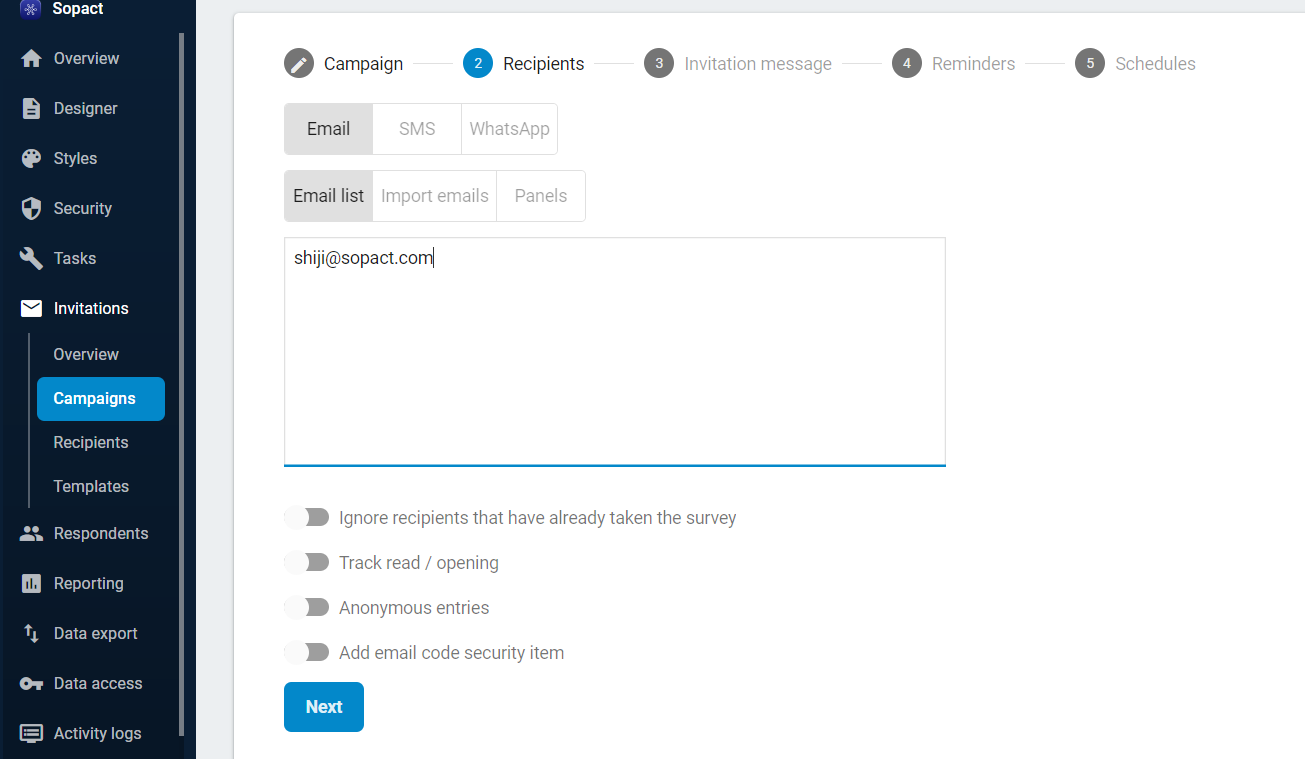
IMPORTANT NOTE :
Do not enable - Add email code security item
DO NOT use panels.
You add multiple receipients in the above dialog box - Below the email id that has been added.
Step 3 : Navigate to Invitation message
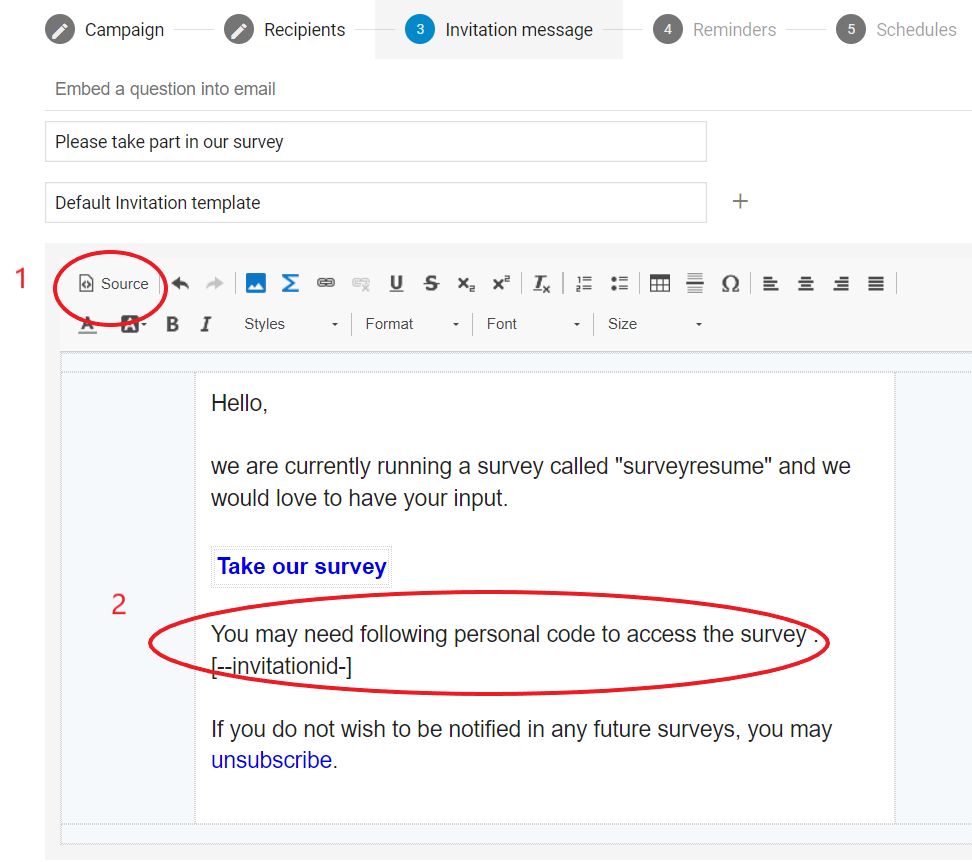
IMPORTANT NOTE :
Remove all reference to invitationid marked as 2
Step 4 : Click on Source - marked with 1
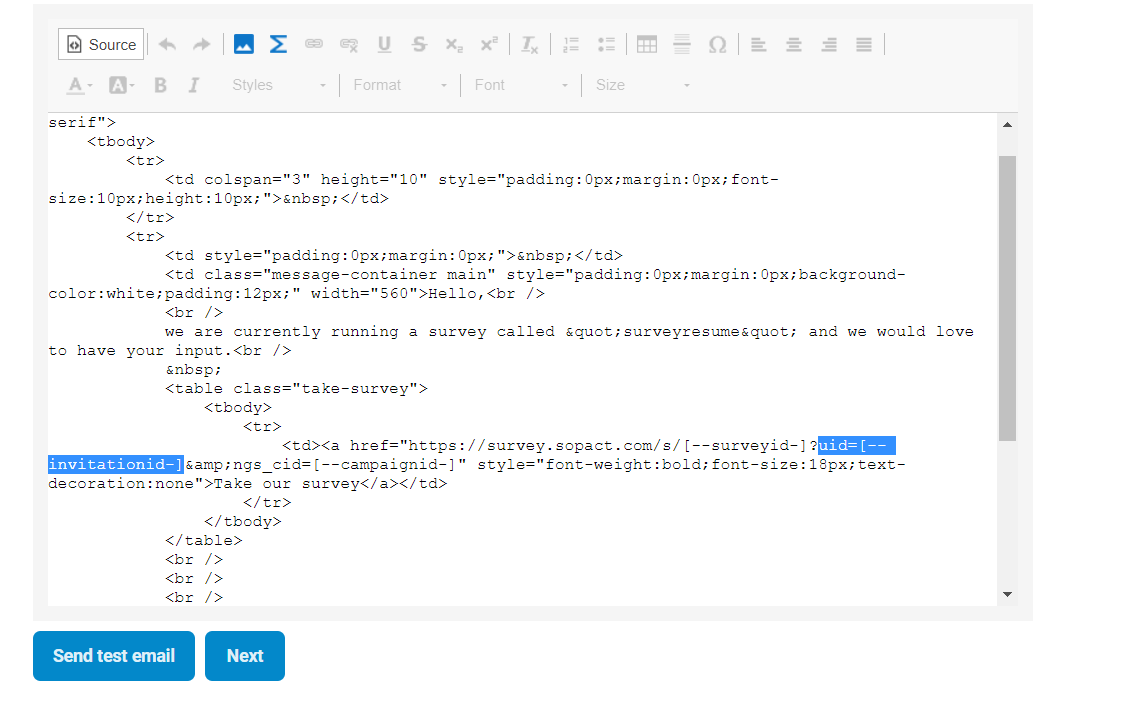
The below screen will open up and Edit this code.
Replace uid=[--invitationid-] with mytoken = [--invitationtoken-] highlighted in blue
mytoken is the name of the token variable it is set before generating the tokens. (Refer to the article on generating tokens)
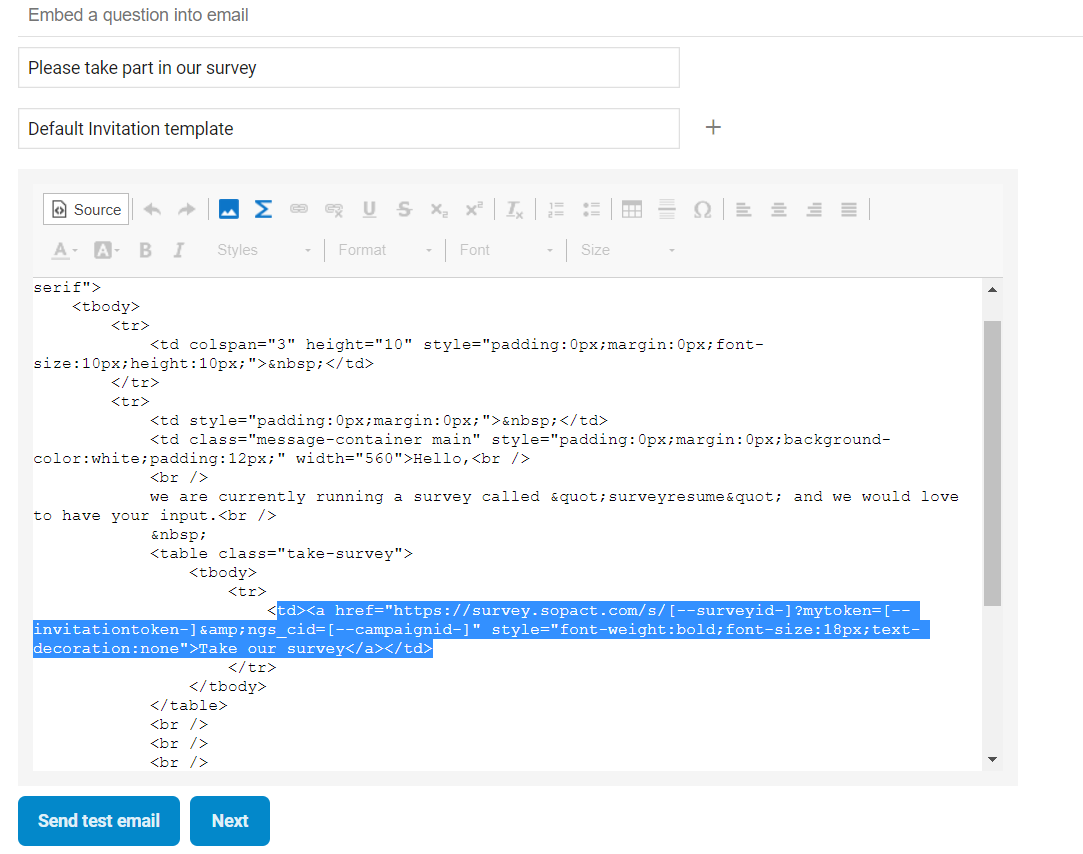
After editing, the source should like as shown below :
Step 5 : Navigate to Next and launch the campaign
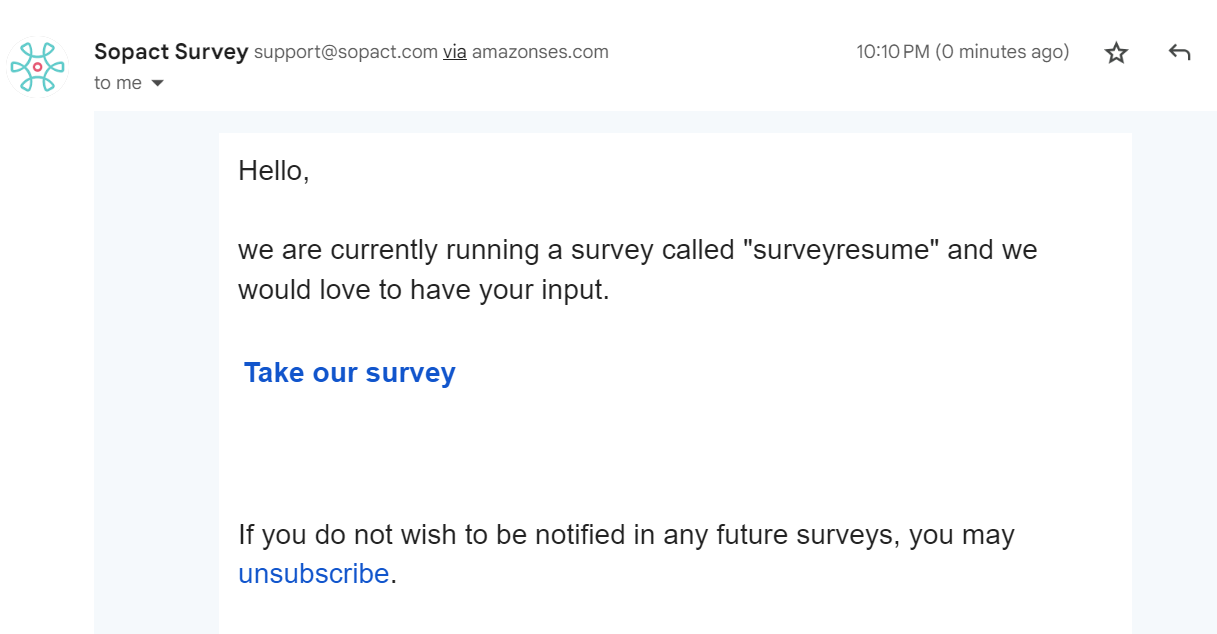
Step 6 : You should receive an email to take up the survey as shown below
Step 6 : Take the survey and save the progress
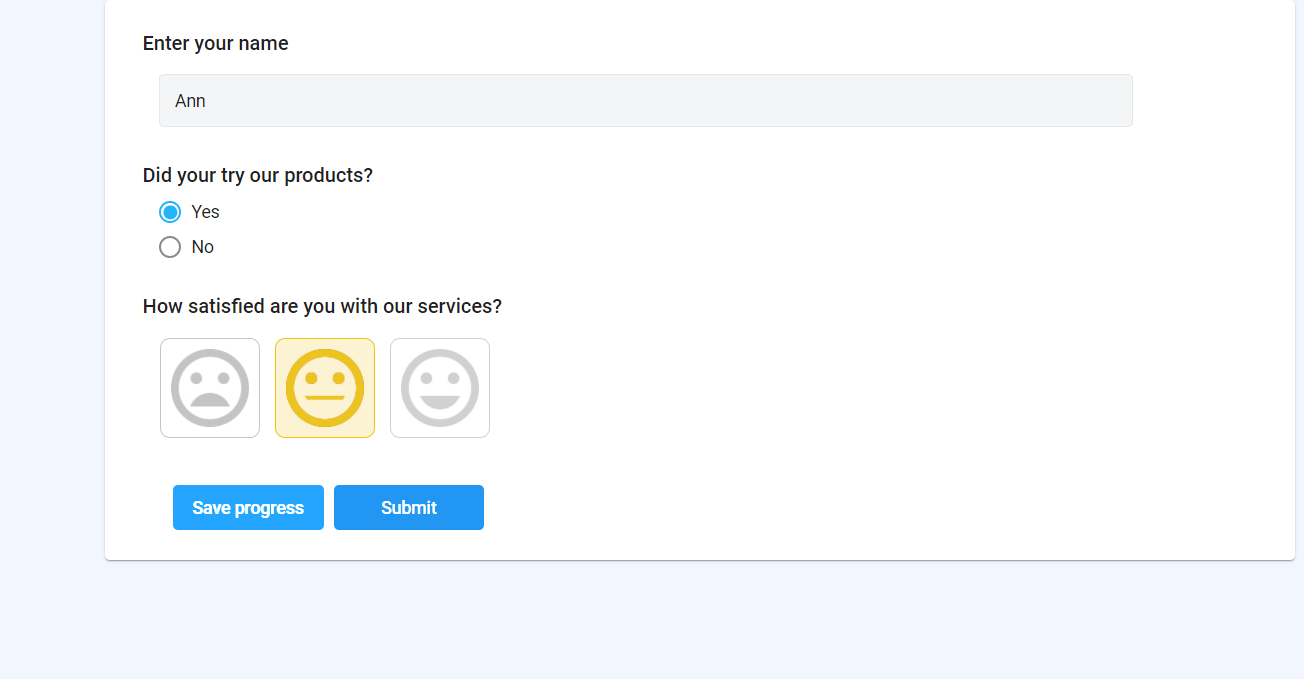
Step 7 : Close this survey and browser
Step 8 : Take the survey again by clicking the same link in the email and completing any additional pages. However, remember to save your progress before quitting the browser.
This email can be forwarded to members of your team so that they can pick up where you left off on the survey.
Step 9 : Once you have completed all of the survey sections, you must submit the survey..
Step 10 : After the survey response is submitted. The status of the survey is as follows

NOTE :
The status shows Pending till you have not submitted the response.
Step 11 : After submission, use the same link in the email to edit your answers. The exact same survey that you previously completed will now appear with the option to change your responses.
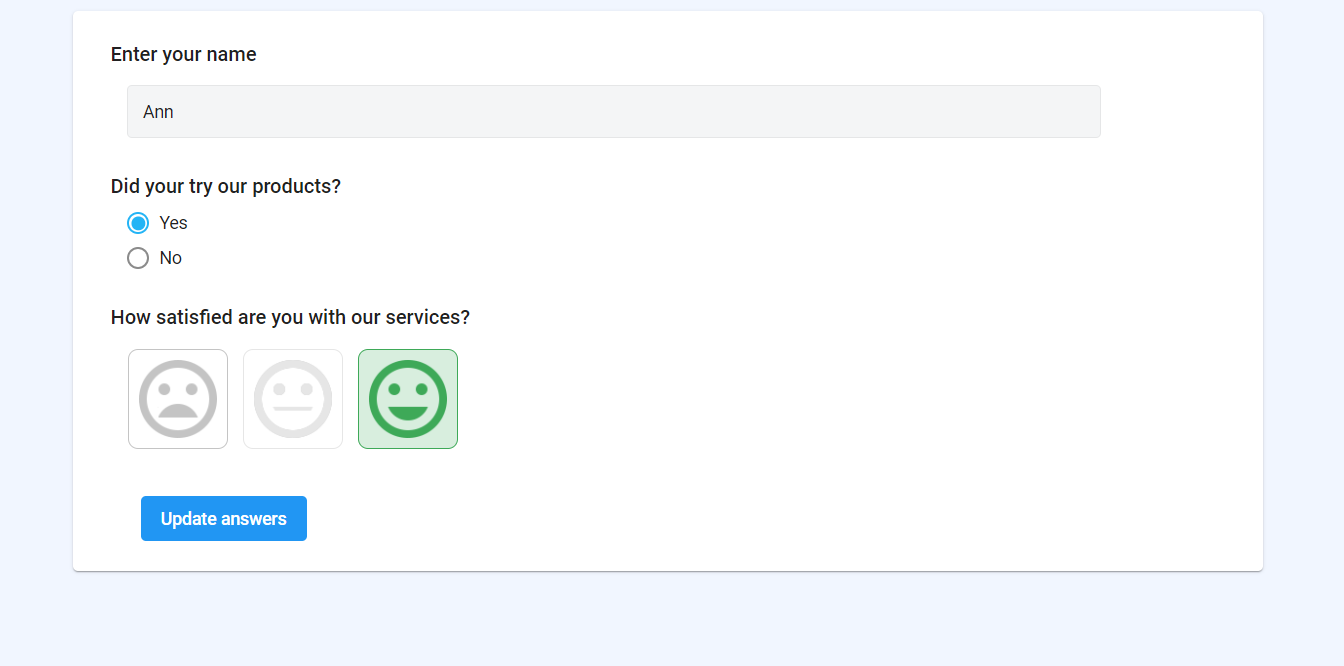
Step 12 : You can edit the information in the surveys. It is updated when you click on Update responses.
Step 13 : This information can be verified from the Respondents responses.

You have learnt to use Access Tokens using a campaigns.
IMPORTANT NOTE :
The Sopact Survey assigns an access token to each user at random from the list of generated tokens so that the survey responses may be tracked while using the campaign.
2nd WAY - STEPS TO SEND OUT SURVEYS WITH ACCESS TOKENS USING WEBLINK
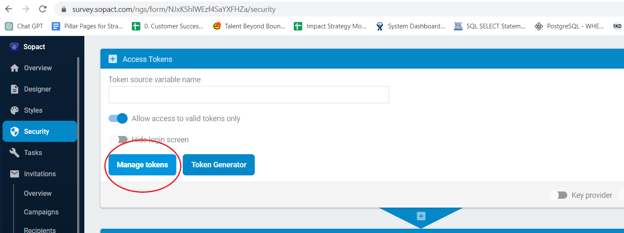
Step 1 : Navigate to Access tokens page in Security. Click on Manage Tokens
Step 2 : The screen below appears. On the right hand side, these are tokens that were generated.
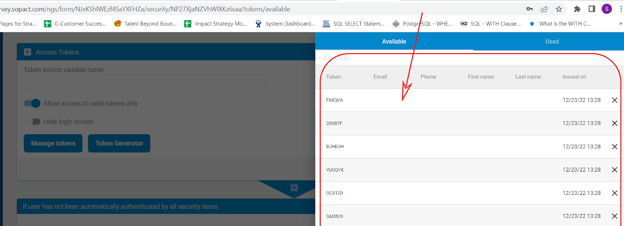
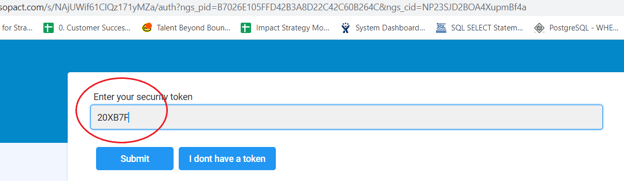
Note: Select one of the tokens that you want to use to allow the users to save and restore their sessions. One of the tokens that is generated - 20XB7F.
Step 3 : Share this token with users while sharing the weblink using email or whatsapp.
Step 4: This token needs to be provided while running the survey
NOTE :
Use this token to resume the progress of the survey before submitting the response or updating the response once submitted while using WEBLINK.
You have learnt to use Access Tokens using a WEBLINK.
ONE MAJOR DIFFERENCE - CAMPAIGN and WEBLINK.
When using Campaign, access tokens are assigned automatically by the Sopact Survey, whereas WEBLINK requires manual assignment through Manage Tokens.